Create your own Twitter-like Pleroma server to follow Mastodon friends
Update: I’ve deleted my Pleroma instance and forwarded the URL to my Mastodon.social account. I still think Pleroma is great for how lightweight it is, but i...

Update: I’ve deleted my Pleroma instance and forwarded the URL to my Mastodon.social account. I still think Pleroma is great for how lightweight it is, but it lacks some important features of Mastodon, such as full export of all your data, including posts. For those still interested in giving Pleroma a try, you can set up your own instance for free on Fly.io using these instructions.
Elon Musk has finally started rolling out the new Twitter Blue plan that charges $8 per month for the pleasure of the seeing a blue checkmark next to your name. But for just $5 per month, you can set up a virtual private server (VPS) on Vultr or DigitalOcean and run your own Twitter-like feed on your own personal domain.
If you’ve been following tech news over the past week, you may have seen that a social network called Mastodon has exploded in popularity since Musk took over Twitter. For those who are unfamiliar, Mastodon is actually open source software that can be installed on any server. Its main selling point is that it uses ActivityPub and is part of the so-called Fediverse, which means you can follow users running their own servers that use any other ActivityPub-based software. That includes Pleroma, which is what this post is about.
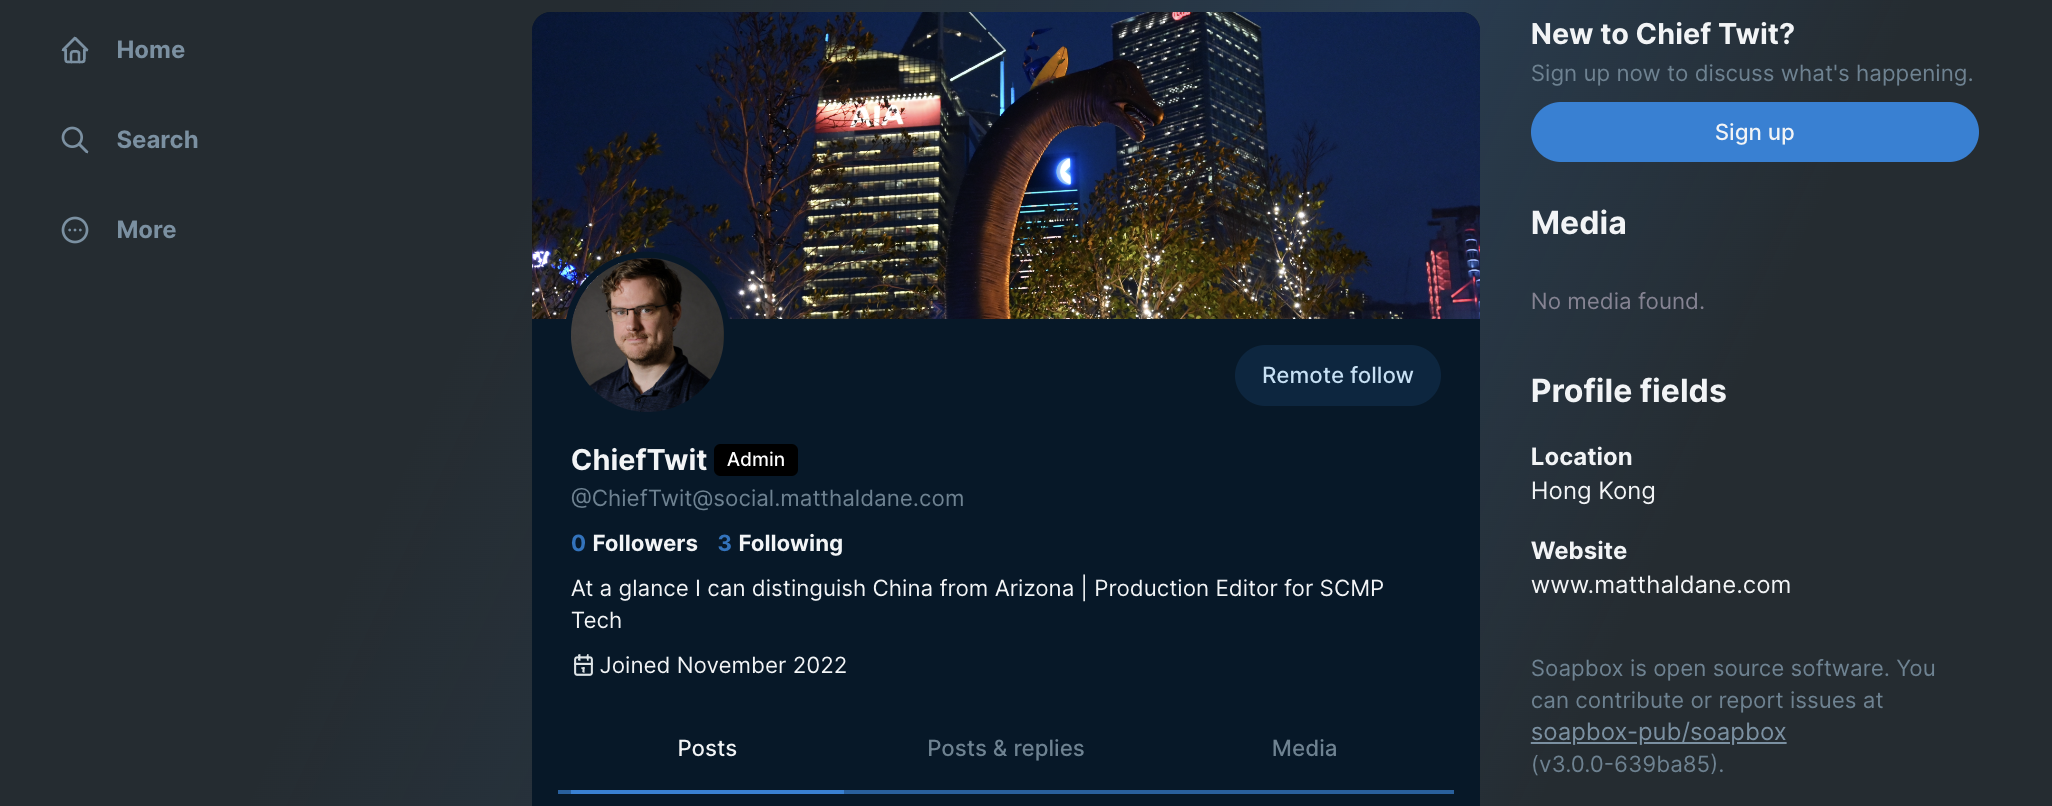
If you’re interested in running your own ActivityPub server for just yourself, Pleroma is a better option than resource-hungry Mastodon. Pleroma runs well on cheap servers, and like Mastodon, you can lock out new user registrations so that it’s a one-person show. But again, you can follow anyone in the Fediverse as long as you know their username and domain. (You could follow the account I’ve set up here from Mastodon.social, for example, by searching for @ChiefTwit@social.matthaldane.com)
There are a lot of guides out there on how to do stuff like this, but here’s a quick look at what I did to set up social.matthaldane.com. I mostly did this to see for myself how well Pleroma would run on a cheap VPS, so if this link goes down at some point in the future, it’s only because having my own Fediverse domain that no one looks at isn’t worth $5 a month, just like a checkmark on Twitter isn’t worth $8 a month.
The average person just looking to drop Twitter is probably best served by just setting up an account on Mastodon.social. If you do decide to set up your own server, though, you can always export the data later and migrate to somewhere else. Another thing that Twitter doesn’t let you do.
So the first thing you need is a server. For this project, I used Vultr and selected their cheapest option (Cloud Compute with Intel Regular Performance) and located it in Singapore. For the flavor of Linux, I generally recommend the latest version of Ubuntu with long term support, which right now is 22.04.
You can use whatever DNS you want, but I use Cloudflare. It offers free DNS proxying, protects against DDoS attacks, and I just like the interface. I recommend adding your server IP address to an A record as soon as you have it. Vultr will show it to you before it’s even done setting up Ubuntu.
When the server is ready, you can connect via SSH. On Mac, open the terminal and type ssh root@<ip address>. On Windows, you’ll need to install software to run SSH. PuTTY is the most popular option. Put in the IP address and connect. It will prompt you for the root password, which on Vultr is available from the server page. DigitalOcean forces you to use ssh keys, which I won’t go into here.
Once in, I like to make sure that I can connect via my domain. I found that Vultr servers block connections over port 80 by default, so you’ll to enable that in iptables.
sudo iptables -I INPUT -p tcp -m tcp --dport 80 -j ACCEPT
Pleroma (and Mastodon) uses nginx as the reverse proxy to make your site accessible. So install that.
sudo apt install nginx
For the certbot that installs the certificate you need to enable HTTPS connections, I used the snap app that bundles all the dependencies together. You can probably install that with sudo apt install too and have it work fine, but having used the snap application before, this is what I chose to do again.
Install snap:
sudo snap install core; sudo snap refresh core
Install certbot:
sudo snap install --classic certbot
Enable the certbot command:
sudo ln -s /snap/bin/certbot /usr/bin/certbot
Get cert and automatically modify the nginx installation:
sudo certbot --nginx
Certbot will ask some questions it needs answered to proceed. Most importantly, it needs the domain of the server, which in my case is social.matthaldane.com. It also needs an email address to alert you when the certificate is going to expire.
Sometimes there is an error if certbot is unable to connect for any reason, like being denied access over port 80.
If everything goes smoothly and you can see the default nginx dummy page at your url, you can proceed to install the dependencies for Pleroma:
sudo apt install git build-essential postgresql postgresql-contrib cmake libmagic-dev elixir erlang-dev erlang-nox imagemagick ffmpeg libimage-exiftool-perl
I then follow the rest of the Pleroma installation instructions here.
There are a couple of other options you may want to change in the config file, which can be edited with sudo nano config/prod.secret.exs.
config :pleroma, configurable_from_database: trueregistrations_open: falseAt the link above, you can stop when you get to the section on nginx. It was already installed above. But you need to copy over the proper configuration files:
sudo cp /opt/pleroma/installation/pleroma.nginx /etc/nginx/sites-available/pleroma.nginx
sudo ln -s /etc/nginx/sites-available/pleroma.nginx /etc/nginx/sites-enabled/pleroma.nginx
Make sure to edit the Pleroma Nginx file and replace the example URL with your actual URL.
sudo nano /etc/nginx/sites-available/pleroma.nginx
Replace all instances of example.tld with your actual domain used for your site. In my case, that would be social.matthaldane.com. This has to be replaced in the first block listening on port 80 and then on the next block for HTTPS on port 443. Also remember to replace the URL in the letsencrypt path. The certs will be under a fold named after the domain name you gave certbot, so it should be the same.
The default nginx config file can now be deleted
sudo rm /etc/nginx/sites-available/default
sudo rm /etc/nginx/sites-enabled/default
Set up your user:
sudo -Hu pleroma MIX_ENV=prod mix pleroma.user new <username> <email@email.com> --admin
The server should work now, but for an extra bit of fun and familiarity, you can make it look very close to Twitter with the Soapbox theme. This also adds some options you don’t get with the default theme. And frankly, the default GUI is pretty terrible, so I recommend going with a different theme.
To install Soapbox, pull the zip file to your server:
curl -L https://gitlab.com/soapbox-pub/soapbox/-/jobs/artifacts/develop/download?job=build-production -o soapbox.zip
Unzip it into your Pleroma instance:
busybox unzip soapbox.zip -o -d /opt/pleroma/instance
The theme should show up automatically by reloading your webpage. No need to restart the service.
Finally, if you want your main page to point to your profile page, you can do this in settings. Once you’re logged in to your server, click on “Soapbox config” in the right sidebar and turn on “Sinle user mode.” Then put your @username in the “Main user handle” field.
This was pretty much all I had to do to get things up and running. Of course, how long I leave it up and running is another question. After all, as Moxie Marlinspike pointed out when talking about the flaws of Web3, “People don’t want to run their own servers.”
But I guess that’s why Mastodon.social exists.
Update: I’ve deleted my Pleroma instance and forwarded the URL to my Mastodon.social account. I still think Pleroma is great for how lightweight it is, but i...
My latest story for the South China Morning Post – Web3 tech helps banned books on piracy site Library Genesis slip through the Great Firewall’s cracks, but ...